Making 3D nail art at home is no longer an unaffordable luxury saved for high-profile fashion campaigns or red carpet events. More beauty enthusiasts are embracing this expressive craft as a result of the proliferation of reasonably priced kits and incredibly clear tutorials on social media. Anyone can create tiny works of art at their fingertips by practicing patience and accuracy. Layered both literally and figuratively, the process is remarkably similar to frosting a cake or sculpting clay, where timing, elevation, and texture work their magic.
Any compromise made here could undermine the entire sculpture. Getting your nails ready is similar to laying the foundation for a sculpture. Carefully file and shape each nail first, then gently buff the surface to remove any remaining oils. To avoid discoloration and ensure a smooth application of your selected color, apply a protective base coat. This background establishes the mood for the entire ensemble, whether you’re going for a striking electric pink or a traditional nude.
3D Nail Art Tools and Materials (Table Ready for WordPress Integration)
| Item | Purpose |
|---|---|
| Base Coat | Shields natural nails, improves polish adhesion |
| Gel or Acrylic Polish | Sets the color foundation for your 3D design |
| Sculpting Gel / Acrylic | Builds raised patterns like flowers or bows |
| Nail Glue | Secures rhinestones, gems, or acrylic details |
| UV/LED Lamp | Cures gel layers and hardens 3D designs |
| Tweezers and Brushes | Provides control for sculpting and placing details |
| Matte or Glossy Top Coat | Finishes the design and protects against chipping |
| Activator Spray (Optional) | Used with resin systems for hardening complex structures |
| Silicon Mat or Nail Form | Helps beginners sculpt off-nail before attachment |
| Trusted Reference | Glamour Magazine’s Nail Art Guide |
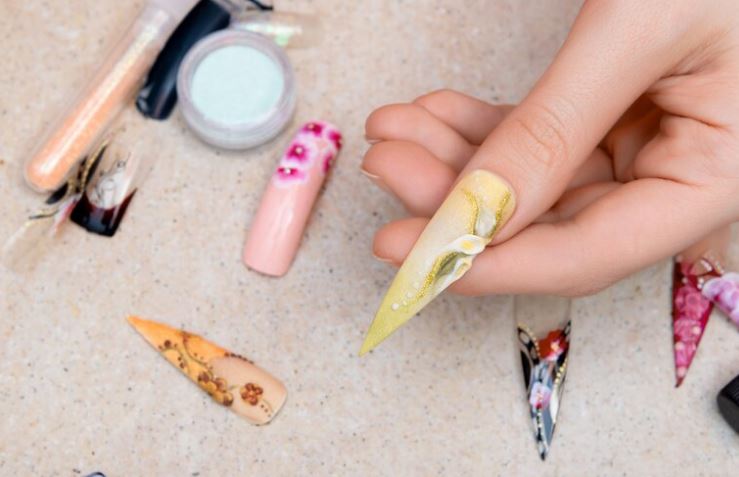
It’s time to start sculpting after you’ve chosen your tools. Using a flat brush, carefully apply a tiny bead of 3D sculpting gel to the nail surface. The substance is pliable but solidifies when exposed to light, much like softened wax. Whether it’s a complex bow, an abstract curve, or a tiny petal, carefully shape it with the tip of your brush. Before adding more details, cure it under a UV lamp to solidify the shape. It’s important to build each sculpted piece gradually so that depth can develop without overpowering the nail.
An alternate option is acrylic, which is especially advantageous for people looking for a finish that is incredibly durable. Before dipping your brush into colored powder, dip it into the monomer. Because the compound hardens quickly, it requires a steady hand and deliberate rhythm. Watching slow-motion tutorials by experts like Mini Ami, who breaks down acrylic flowers into manageable steps, may be beneficial for beginners. Her approach, which starts with tiny spheres and progresses to extensions that resemble leaves, has significantly lowered the learning curve for at-home artists.
Adding 3D components like crystals or rhinestones adds an opulent touch. Pick up each embellishment with tweezers and gently place it over a dab of nail glue. To guarantee grip, press briefly, then let it set. Balance is crucial in this situation. While thoughtful placement enhances elegance, excessive embellishment runs the risk of distracting and unstable effects. For example, wearing matte polish, which is popular among runway models and celebrity stylists alike, with a single gem at the base of the nail creates a stylish contrast.
During fashion shows, designers such as Simone Rocha and Marc Jacobs have incorporated nail art, seeing it as an extension of the storyline of the collection. Their stylists frequently work with well-known manicurists to coordinate nail art with the color scheme or texture of the fabric. This combination of nail art and fashion has encouraged do-it-yourselfers to think about balance in nail art, outfits, and accessories. The public’s perception has been significantly altered by this trend; 3D nail art is now seen as a storytelling medium rather than a pointless luxury.
Precision becomes crucial when creating your designs directly on the nail. However, if you’re still practicing, you might find that using a nail form or silicon mat works remarkably well. Create the design by hand, cure it, and then adhere it. This approach permits revisions prior to commitment and greatly lessens pressure. For those who are unfamiliar with the medium, Mylee’s tutorials highlight this technique as especially inventive. Many people have used their detailed instructions to perfect intricate designs, such as butterfly wings and raised floral bouquets.
The increasing popularity of 3D nail art has been boosted by musicians and influencers. Pop star Dua Lipa recently showed off her milky lavender nails with sculpted lilies at a music awards event, which sparked a wave of TikTok imitations. As tutorials gained popularity, creators used chrome powder and builder gel to break down her style. The technique’s cultural integration is demonstrated by this type of virality. It’s now more than just a fad for beauty; it’s a part of a larger movement that values uniqueness and artistry.
The cost of creating 3D nail art at home is surprisingly low. Even high-end gel sets cost less than £100, and the majority of entry-level kits cost between £30 and £70. This DIY approach is much less expensive without compromising results than salon visits, which frequently cost over £120. This is especially true when combined with online tutorials from seasoned professionals in the field. Regular cuticle care, avoiding harsh impacts, and using cuticle oil every day to stay hydrated are all part of maintenance.
Gaining confidence by practicing basic textures like waves or dots will help you transition to multi-dimensional shapes. You can also try different finishes; glossy tips on a matte base create a striking contrast. You can broaden your creative vocabulary and produce effects that are distinctively yours by switching up top coats or adding delicate glitter flakes. These developments, which are frequently the result of trial and error, expand the possibilities of nail art.
This artistic medium is entwined with self-expression, empowerment, and identity in a cultural context. Nail art has a rich political and aesthetic history, especially in communities of color. 3D nail art has been proudly elevated by artists such as Cardi B and Saweetie, who have made it a visual autobiography and a fashion signature. Their decisions have an impact on millions of people and inspire others to pursue artistic endeavors that speak to them personally.
The distinctions between art, fashion, and beauty have become increasingly hazy in recent years. 3D nail art is becoming more than just a cosmetic accessory; it’s becoming a dynamic kind of wearable sculpture as we continue to appreciate unique stories and handcrafted details. The practice honors creativity, skill, and joy whether you’re creating something completely original or copying a celebrity’s style.